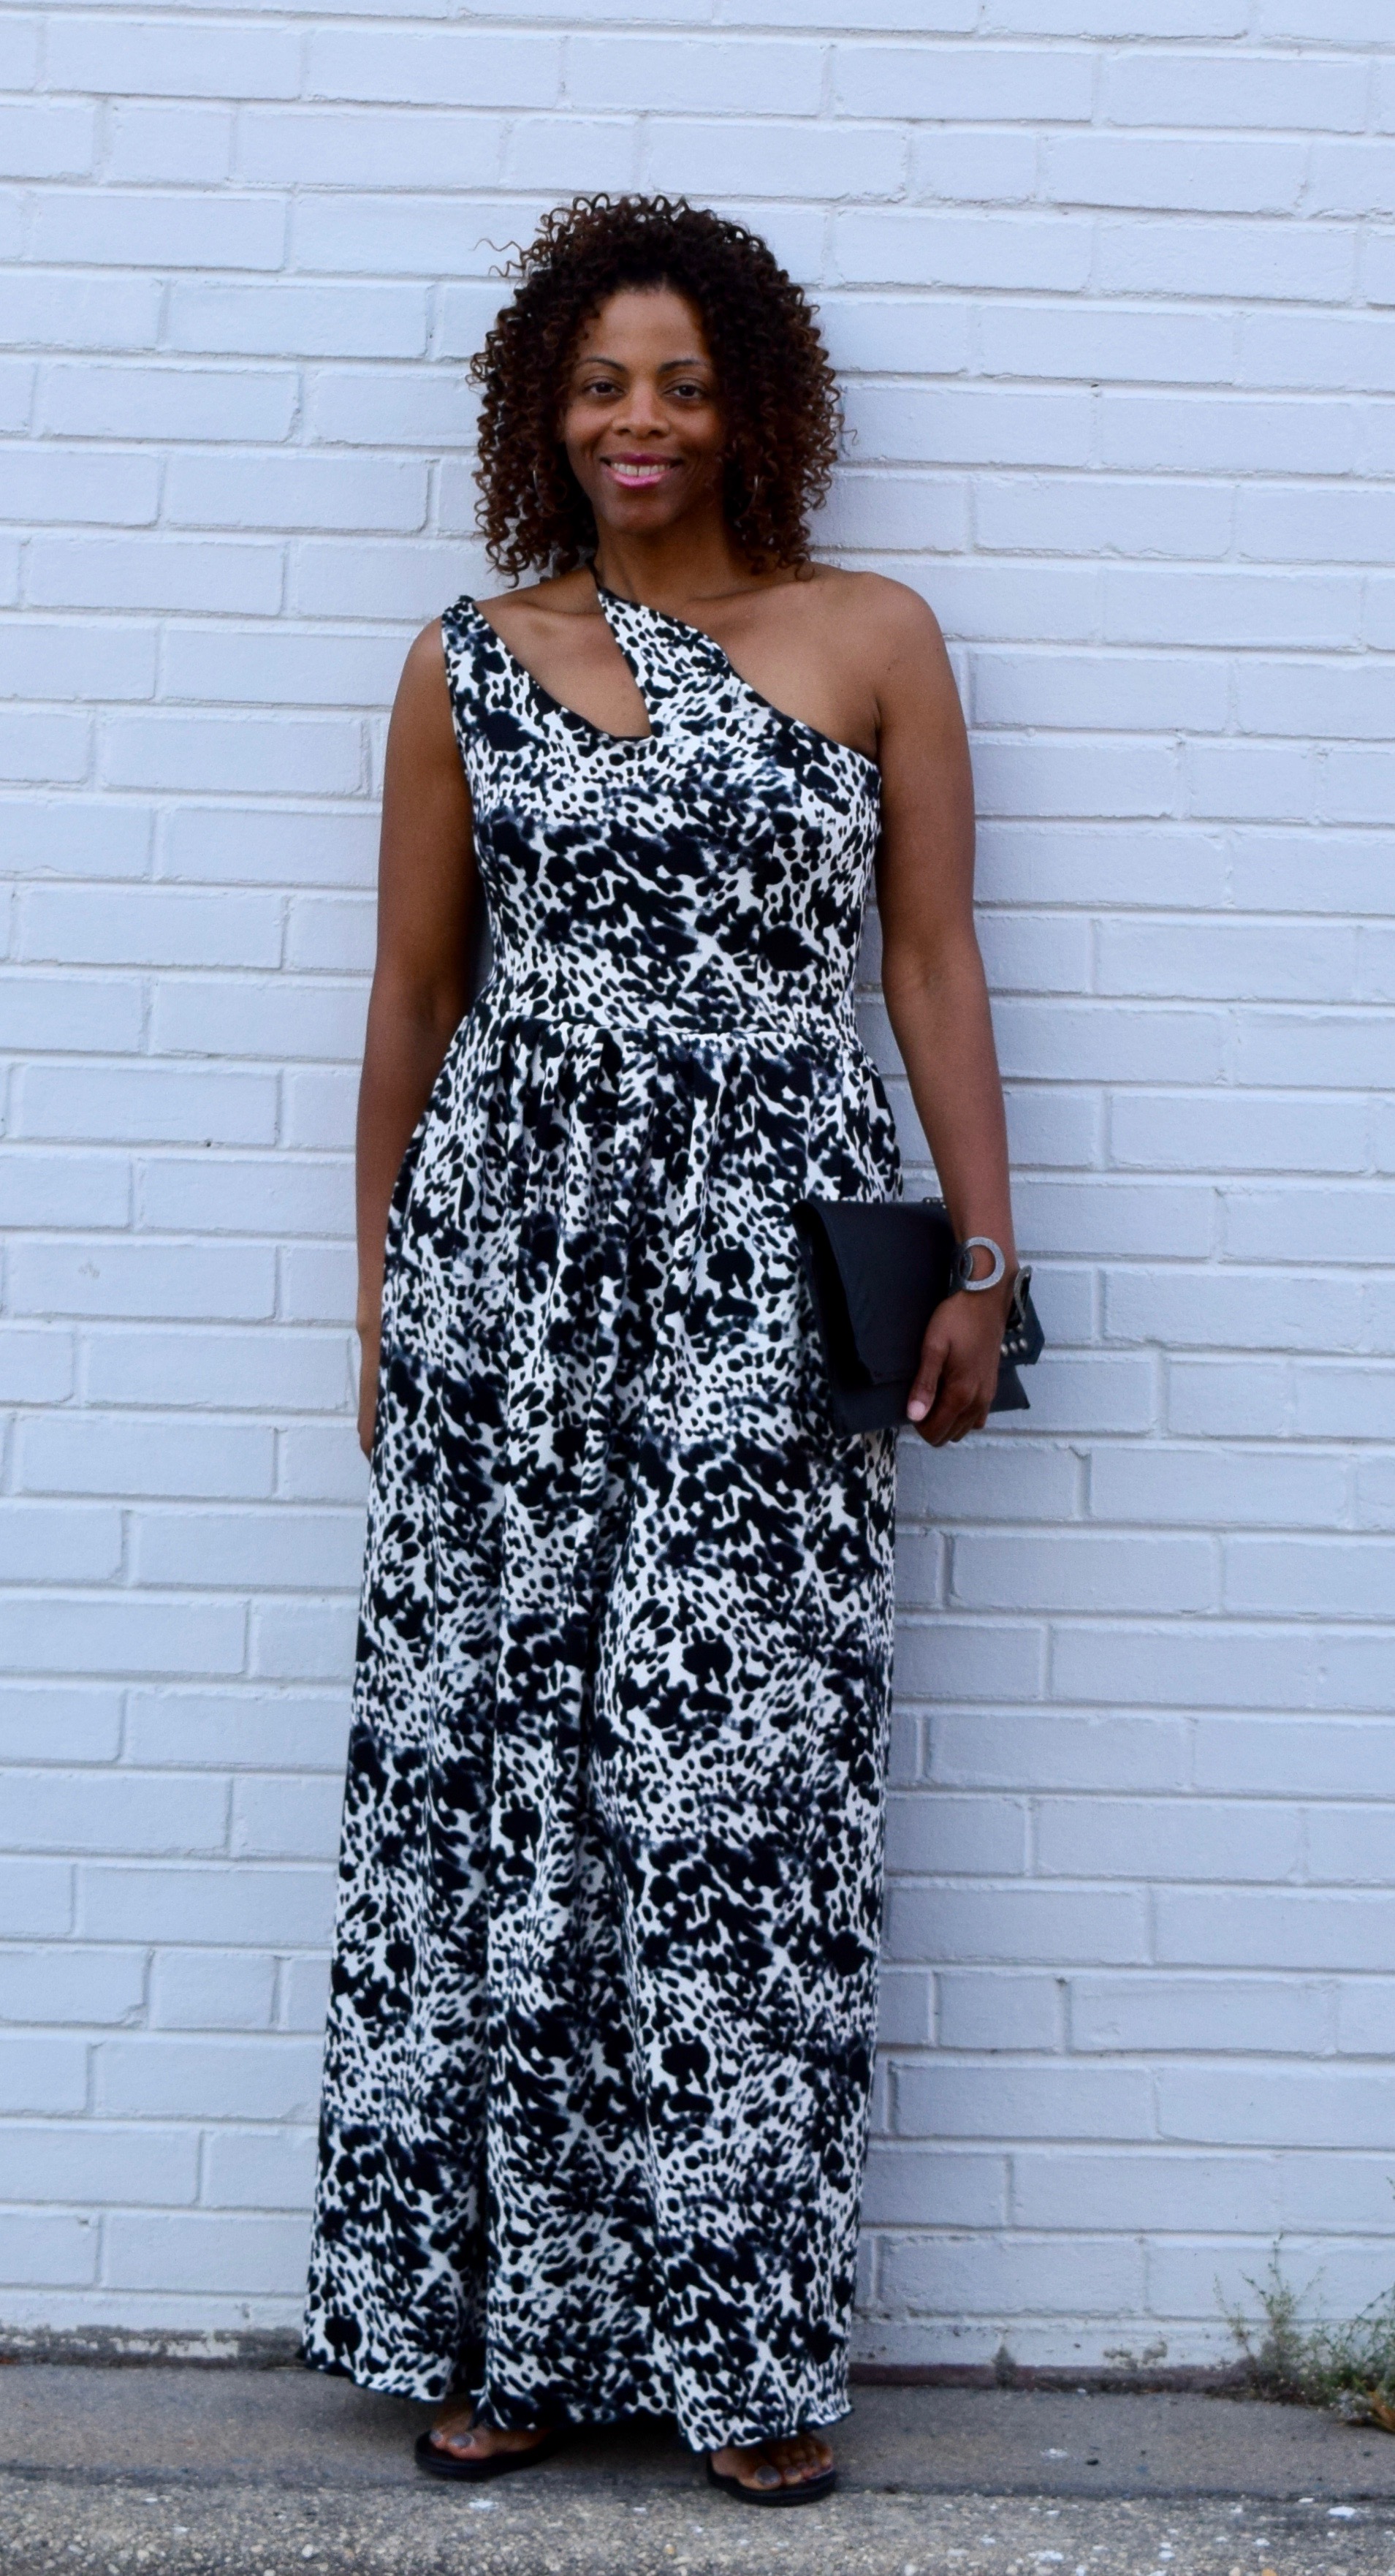
The Making Of My Cushnie-inspired Maxi Dress

I have been a fan of the luxury women’s wear brand Cushnie (formerly Cushnie et Ochs) for many years.  I love the brand’s use of vibrant colors and the sexiness of its garments.  The moment I saw Michelle Obama at the 2017 ESPYS in the Cushnie Et Ochs Larissa dress, I was instantly inspired.  I absolutely loved the neckline and the fit.  This particular dress has an understated sexiness that fits well with my fashion aesthetic.  Unfortunately, the $1900 price tag is not sexy and does not fit my wallet aesthetic.


I already have a little black dress but love this neckline and wanted to incorporate it into a DIY project.  I’ve been into jumpsuits lately and have the perfect fuschia crepe for it.  Before I cut into that, I needed to make sure that I got the details of the neckline perfected on a practice project first (i.e. create a muslin or toile).  Rather than use traditional muslin fabric, I used an animal print scuba knit from Fabric.com that I’ve had in my stash for. . .let’s just say a long time. I decided on a maxi dress for the test garment.

fabric snapshot.jpg

I started with drafting a bodice sloper. I then traced to get a full front bodice pattern piece (black outline in the picture).  I studied photos of the original dress.  I then drew in the cutouts on the piece (purple lines on the pattern piece). 

So here is where the project started to go left:

Laziness got the best of me: Instead of repeating the drafting process with the back bodice pattern piece, I just cut two fronts. I know good and well my front and back are not shaped the same but. . . oh well.

When I first started constructing the bodice, the fit was of course terrible because it was HUGE. I fixed that problem and lined the bodice.

DSC_0850.jpg

Moment number two when things went even further left: I don’t have a tailor clapper so as I was ironing the bodice seams, I placed my pattern weights on the seam to help flatten them. I moved the bodice while the weights were on the seams and ended up stretching out the neckline. DOH!!!!! So even though the shape was what I wanted, I completely destroyed the neckline by stretching it. The solution: fold over the stretched out part and keep in movin’. But you can still see that the neckline does not lay perfectly flat.

DSC_0711.jpeg

I kept the skirt relatively simple. The width of the scuba knit was about 60 inches so I opened the fabric and sewed the back center seam parallel to the selvedge. I divided this piece into quarters and matched the center front and back of the skirt with the center front and back of the bodice. I matched the other markings with the side seam. To make the circumference of the skirt piece the same as the bottom of the bodice, I pleated the front and gathered the back. I sewed the two pieces together and Voila! A wearable muslin.

DSC_0723.jpeg

For the next garment, I won’t be making the same mistakes again. Lessons learned in preparation for making the real garment:

#1- I should not have skipped stay stitching the neckline.

#2 I should have been more careful when I was ironing this knit fabric.

#3 Cutting two front bodice pieces instead of one front and one back was just plain silliness.

Overall, I like the dress and plan on wearing it.

Previous
Previous

A Sewer's Guide to Black Friday and Cyber Monday 2019

Next
Next

Denim on Denim for the Spring